Paolo's Blog Random thoughts of a Junior Computer Scientist
On Overview of how Python works under the hoods (Part 2)
In the previous post, I’ve given you an overview of what the compilation process is like in Python. Now that we have the compiled bytecode let’s see what happens when the Python Virtual Machine, the interpreter, runs that code.
Some programming languages (e.g., C++) are translated into instructions that run directly on hardware. We speak of compiling programs in that language onto a specific hardware architecture. Other programming languages (e.g., Java and Python) are translated to run on a common architecture: interpreters (or virtual machines) for that architecture can be written in a low-level language (like C, which targets most architectures) or in the machine’s hardware language itself for maximal speed, so that exactly the same translated programs can run on any architecture that has the virtual machine program implemented on it.
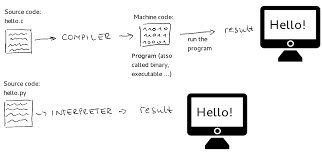
This makes the interpreted languages more portable than the compiled one because to produce a good compiler for a new architecture, and compiling a program can take a long time. But this comes with a cost, the interpreted represent an extra layer of software that reduces the language performance, so the interpreted languages are 2-10 times slower than the compiled one. So there isn’t the right way to write a language translator: each approach comes with its own advantages and disadvantages, and each can be used/abused in situations.
An overview of the Python Bytecode
A Python bytecode instruction consist of:
- opcode: numeric code for operation, corresponding to the opcode values and the bytecode values in the opcode collections. A mapping of the numeric codes and the human readable opnames can be obtained by calling
dis.opmap. - opname: human readable name for operation
- arg: numeric argument to operation (if any), otherwise
None - argval: resolved arg value (if known), otherwise same as arg
- argrepr: human readable description of operation argument
- offset: start index of operation within bytecode sequence
- starts_line: line started by this opcode (if any), otherwise
None - is_jump_target: True if other code jumps to here, otherwise
False
For example let’s take a look of how the BINARY_ADD instruction is structured:
Instruction(
  opname='BINARY_ADD',
  opcode=23,
  arg=None,
  argval=None,
  argrepr='',
  offset=14,
  starts_line=None,
  is_jump_target=False
)
The human readable name for the instruction is BINARY_ADD and the corresponding opcode is 23. It has no numeric argument (arg) to the operation hence no argval and argrepr. The offset, which is the start index of the operation within the bytecode sequence, is 16. The + in this example is not the first instruction in the line hence starts_line is None. No code is jumping to this instruction resulting in is_jump_target=False.
Understanding the Bytecode
Given a Python function you can always access its code attribute and get the bytecode, here’s how
def factorial(x) -> int:
    facts = [1]
    for i in range(1, x + 1):
        facts.append(facts[i - 1] * i)

    return facts[x]


def func_obj(fo):
    print(fo.__name__)
    print('  co_varnames:',fo.__code__.co_varnames)
    print('  co_names   :',fo.__code__.co_names)
    print('  co_consts  :',fo.__code__.co_consts,'\n')
    print('Source Line  m  operation/byte-code      operand (useful name/number)\n'+69*'-')
    dis.dis(fo)

func_obj(factorial)
factorial
  co_varnames: ('x', 'facts', 'i')
  co_names   : ('range', 'append')
  co_consts  : (None, 1)

Source Line  m  operation/byte-code      operand (useful name/number)
---------------------------------------------------------------------
  4           0 LOAD_CONST               1 (1)
              2 BUILD_LIST               1
              4 STORE_FAST               1 (facts)

  5           6 LOAD_GLOBAL              0 (range)
              8 LOAD_CONST               1 (1)
             10 LOAD_FAST                0 (x)
             12 LOAD_CONST               1 (1)
             14 BINARY_ADD
             16 CALL_FUNCTION            2
             18 GET_ITER
        >>   20 FOR_ITER                26 (to 48)
             22 STORE_FAST               2 (i)

  6          24 LOAD_FAST                1 (facts)
             26 LOAD_METHOD              1 (append)
             28 LOAD_FAST                1 (facts)
             30 LOAD_FAST                2 (i)
             32 LOAD_CONST               1 (1)
             34 BINARY_SUBTRACT
             36 BINARY_SUBSCR
             38 LOAD_FAST                2 (i)
             40 BINARY_MULTIPLY
             42 CALL_METHOD              1
             44 POP_TOP
             46 JUMP_ABSOLUTE           20

  8     >>   48 LOAD_FAST                1 (facts)
             50 LOAD_FAST                0 (x)
             52 BINARY_SUBSCR
             54 RETURN_VALUE
There are tons of code attribute, if are curious check out the official docs. These attributes are used directly by the bytecode built by the compilation process. But before we’ll dive into the bytecode of the factorial function, let’s first try to understand how it works with a simple example.
The PVM is a stack bases virtual machine, which means that it uses a “regular” stack for the execution of the bytecode.
There is also a secondarily important block stack that is used to store information about nested loops, try, and with statements. For example, a break statement is translated into code that uses the block stack to determine which loop to break out of (and how to continue executing at the first statement outside the loop). As loops, try/except, and with statements are started, information about their blocks are pushed onto the block stack; as they terminate, this information is popped off the block stack.
Let’s see what happens when the PVM execute a simple math operation: d = a + b * c, assuming that a, b, c, and d are local variables inside a function: assume co_varnames is (‘a’, ‘b’, ‘c’, ‘d’) and the actual values
for these names are stored in a parallel tuple (1, 2, 3, None): e.g., the value
for ‘a’ is 1, the value for ‘b’ is 2, the value for ‘c’ is 3, and the value for
‘d’ is None. Generally, the value for a name at index i in the co_varnames tuple
is stored in index i in the tuple of actual values.
The PVM code for d = a + b *c is
            0 LOAD_FAST                0 (a)
            2 LOAD_FAST                1 (b)
            4 LOAD_FAST                2 (c)
            6 BINARY_MULTIPLY
            8 BINARY_ADD
            10 STORE_FAST               3 (d)
The first column is the offset of the given instruction from the start of the bytecode. Assuming the bytecode string is contained in an array, then this value is the index of the instruction into the array. The second column is the actual human-readable instruction opcode; the full range of opcodes are found in the Include/opcode.h module. The third column is the argument to the instruction.
The last column is the value of the argument - provided by the dis function for ease of use.
The LOAD_FAST instruction pushes a reference to the local co_varnames[var_num] onto the stack. For the first instruction, LOAD_FAST pushes onto the stack co_varnames[0], which is a.
The BINARY_MULTIPLY instruction load/push onto the stack the * of the two values on the top.
The BINARY_ADD instrucion load/push onto the stack the + of the two values on the top.
The STORE_FAST istruction store/pop the value on the top of the stack into co_varnames[N].
Here’s what happens in the stack step by step.
| index | value |
|---|---|
| 3 | |
| 2 | |
| 1 | |
| 0 |
Initially the stack is empty.
| index | value |
|---|---|
| 3 | |
| 2 | |
| 1 | |
| 0 | 1: value of a |
execute LOAD_FAST 0
| index | value |
|---|---|
| 3 | |
| 2 | |
| 1 | 2: value of b |
| 0 | 1: value of a |
execute LOAD_FAST 1
| index | value |
|---|---|
| 3 | |
| 2 | 3: value of c |
| 1 | 2: value of b |
| 0 | 1: value of a |
execute LOAD_FAST 2
| index | value |
|---|---|
| 3 | |
| 2 | |
| 1 | 6: value of b*c |
| 0 | 1: value of a |
execute BINARY_MULTIPLY
| index | value |
|---|---|
| 3 | |
| 2 | |
| 1 | |
| 0 | 7: value of a+b*c |
execute BINARY_ADD
| index | value |
|---|---|
| 3 | |
| 2 | |
| 1 | |
| 0 |
execute STORE_FAST 3
At this point d’s value is 7, the value that was at the top of the stack when STORE_FAST was executed. The actual values for these names are stored in the tuple (1, 2, 3, 7).
Executing the factorial
Now that we understand, or at least have an overview of how the bytecode is execute let’s see how the bytecode of the factorial function listed above is actually executed.
Here’s again the resulting bytecode:
Source Line  m  operation/byte-code      operand (useful name/number)
---------------------------------------------------------------------
  4           0 LOAD_CONST               1 (1)
              2 BUILD_LIST               1
              4 STORE_FAST               1 (facts)

  5           6 LOAD_GLOBAL              0 (range)
              8 LOAD_CONST               1 (1)
             10 LOAD_FAST                0 (x)
             12 LOAD_CONST               1 (1)
             14 BINARY_ADD
             16 CALL_FUNCTION            2
             18 GET_ITER
        >>   20 FOR_ITER                26 (to 48)
             22 STORE_FAST               2 (i)

  6          24 LOAD_FAST                1 (facts)
             26 LOAD_METHOD              1 (append)
             28 LOAD_FAST                1 (facts)
             30 LOAD_FAST                2 (i)
             32 LOAD_CONST               1 (1)
             34 BINARY_SUBTRACT
             36 BINARY_SUBSCR
             38 LOAD_FAST                2 (i)
             40 BINARY_MULTIPLY
             42 CALL_METHOD              1
             44 POP_TOP
             46 JUMP_ABSOLUTE           20

  8     >>   48 LOAD_FAST                1 (facts)
             50 LOAD_FAST                0 (x)
             52 BINARY_SUBSCR
             54 RETURN_VALUE
Note the any line preface by » means that some other instruction in the function can jump to it. Jumping in the PVM (also in the assembly language) is how loops and if statements in Python are do their computation.
For the sake of simplicity, I’ll call TOS(top of the stacl) the first item store on top of the stack and TOS1 the value store under TOS.
Now let’s see how the bytecode is executed:
- Line 4:
- m[0]: loads the value 0 (
con_consts[1]) onto the stack - m[2] Creates a list consiming 1 item from the stack, and pushes the resulting list onto the stack
- m[4] stores the list into facts (co_varname[1])
- m[0]: loads the value 0 (
- Line 5:
- m[6] loads the global named
co_names[range]onto the stack - m[8] pushes
co_consts[1]onto the stack - m[10] pushes a reference to the local
co_varnames[1](x) onto the stack. - m[12] pushes
co_consts[1](1) onto the stack - m[14] adds the 2 first value on the top of the stack and it pushes the result onto the stack, hence performs the opration
TOS = TOS + TOS1 - m[16] call the function
rangewhere 2 is the number of arguments - m[18] performs the operation
TOS = iter(TOS) - m[20] loads the next iterator value on the stack, jumping to m[32] if
StopIterationraised - m[22] stores the next value into
i(co_varnames[2]), popping it off the stack
- m[6] loads the global named
- Line 6:
- m[24] loads the value of
factsonto the stack - m[26] loads the method
appendonto the stack - m[28] loads the value of
factsonto the stack - m[30] loads the value of
ionto the stack - m[32] loads the const of
1onto the stack - m[34] subtract the value
TOStoTOS1and store the result inTOS - m[36] performs the operation
TOS = TOS1[TOS] - m[38] load the value
ion the stack - m[40] Performs the multiplication between
TOS(i) andTOS1(facts[i - 1]) and store the result inTOS. - m[42] call the method store in
TOS1which is append - m[44] removes the top-of-stack
TOSitem - m[46] jump to the instruction 20 (which is the for loop)
- m[24] loads the value of
- Line 8:
- m[48] load
factsonto the stack - m[50] load the value store in
xonto the stack - m[52] performs the operation
TOS = TOS1[TOS], which isTOS = facts[x] - m[54] return form the funtion with the result on the top of the stack
- m[48] load
For those of you that are more curious that want to find out more about the dis module and the PVM’s opcodes here the link of the official documentation.
Summary
Congratulations, you made it through the post and learned something about the Python bytecode and Python’s dis-module! I hope you guys have learned something about this beatiful programming language! Stay curious and keep learning!
References
- Inside the Python Virtual Machine
- Executing Code in The Python Virtual Machine
- Disassemble your python code
- dis module